Halloween witch and hat
Halloween witch and hat
Halloween Witch:
Made using card, PVA glue, white pencil and glitter.
Templates for project below - print these out on A4 white paper before starting:
YouTube video:
How we make our spooky Halloween Witch:
Step 1:
Use orange or red card as an A3 background.
Step 2:
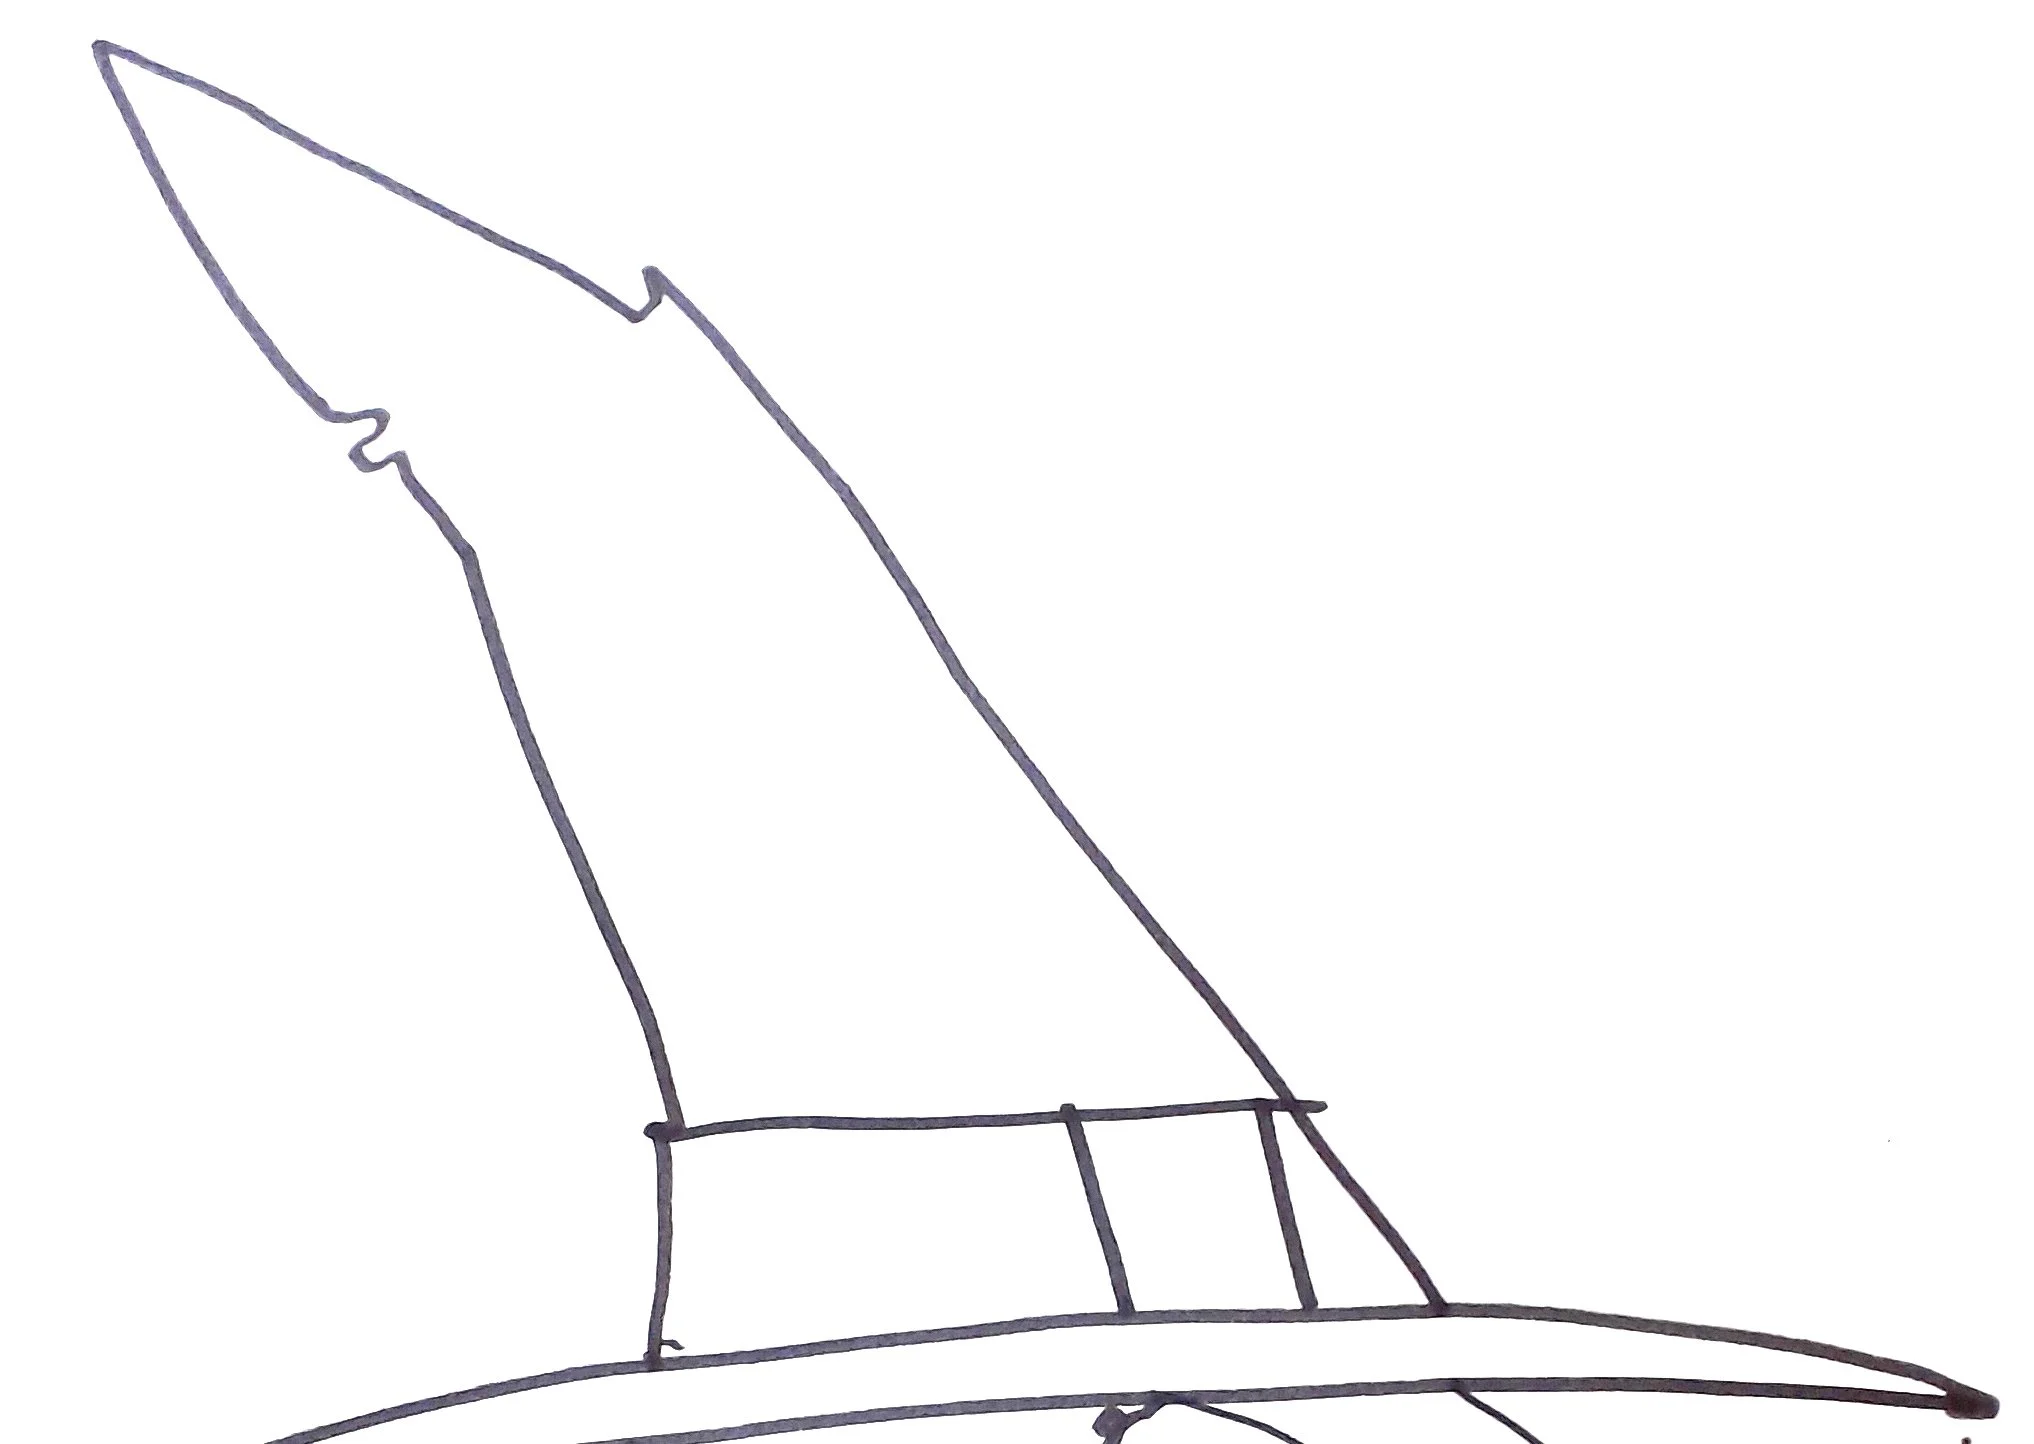
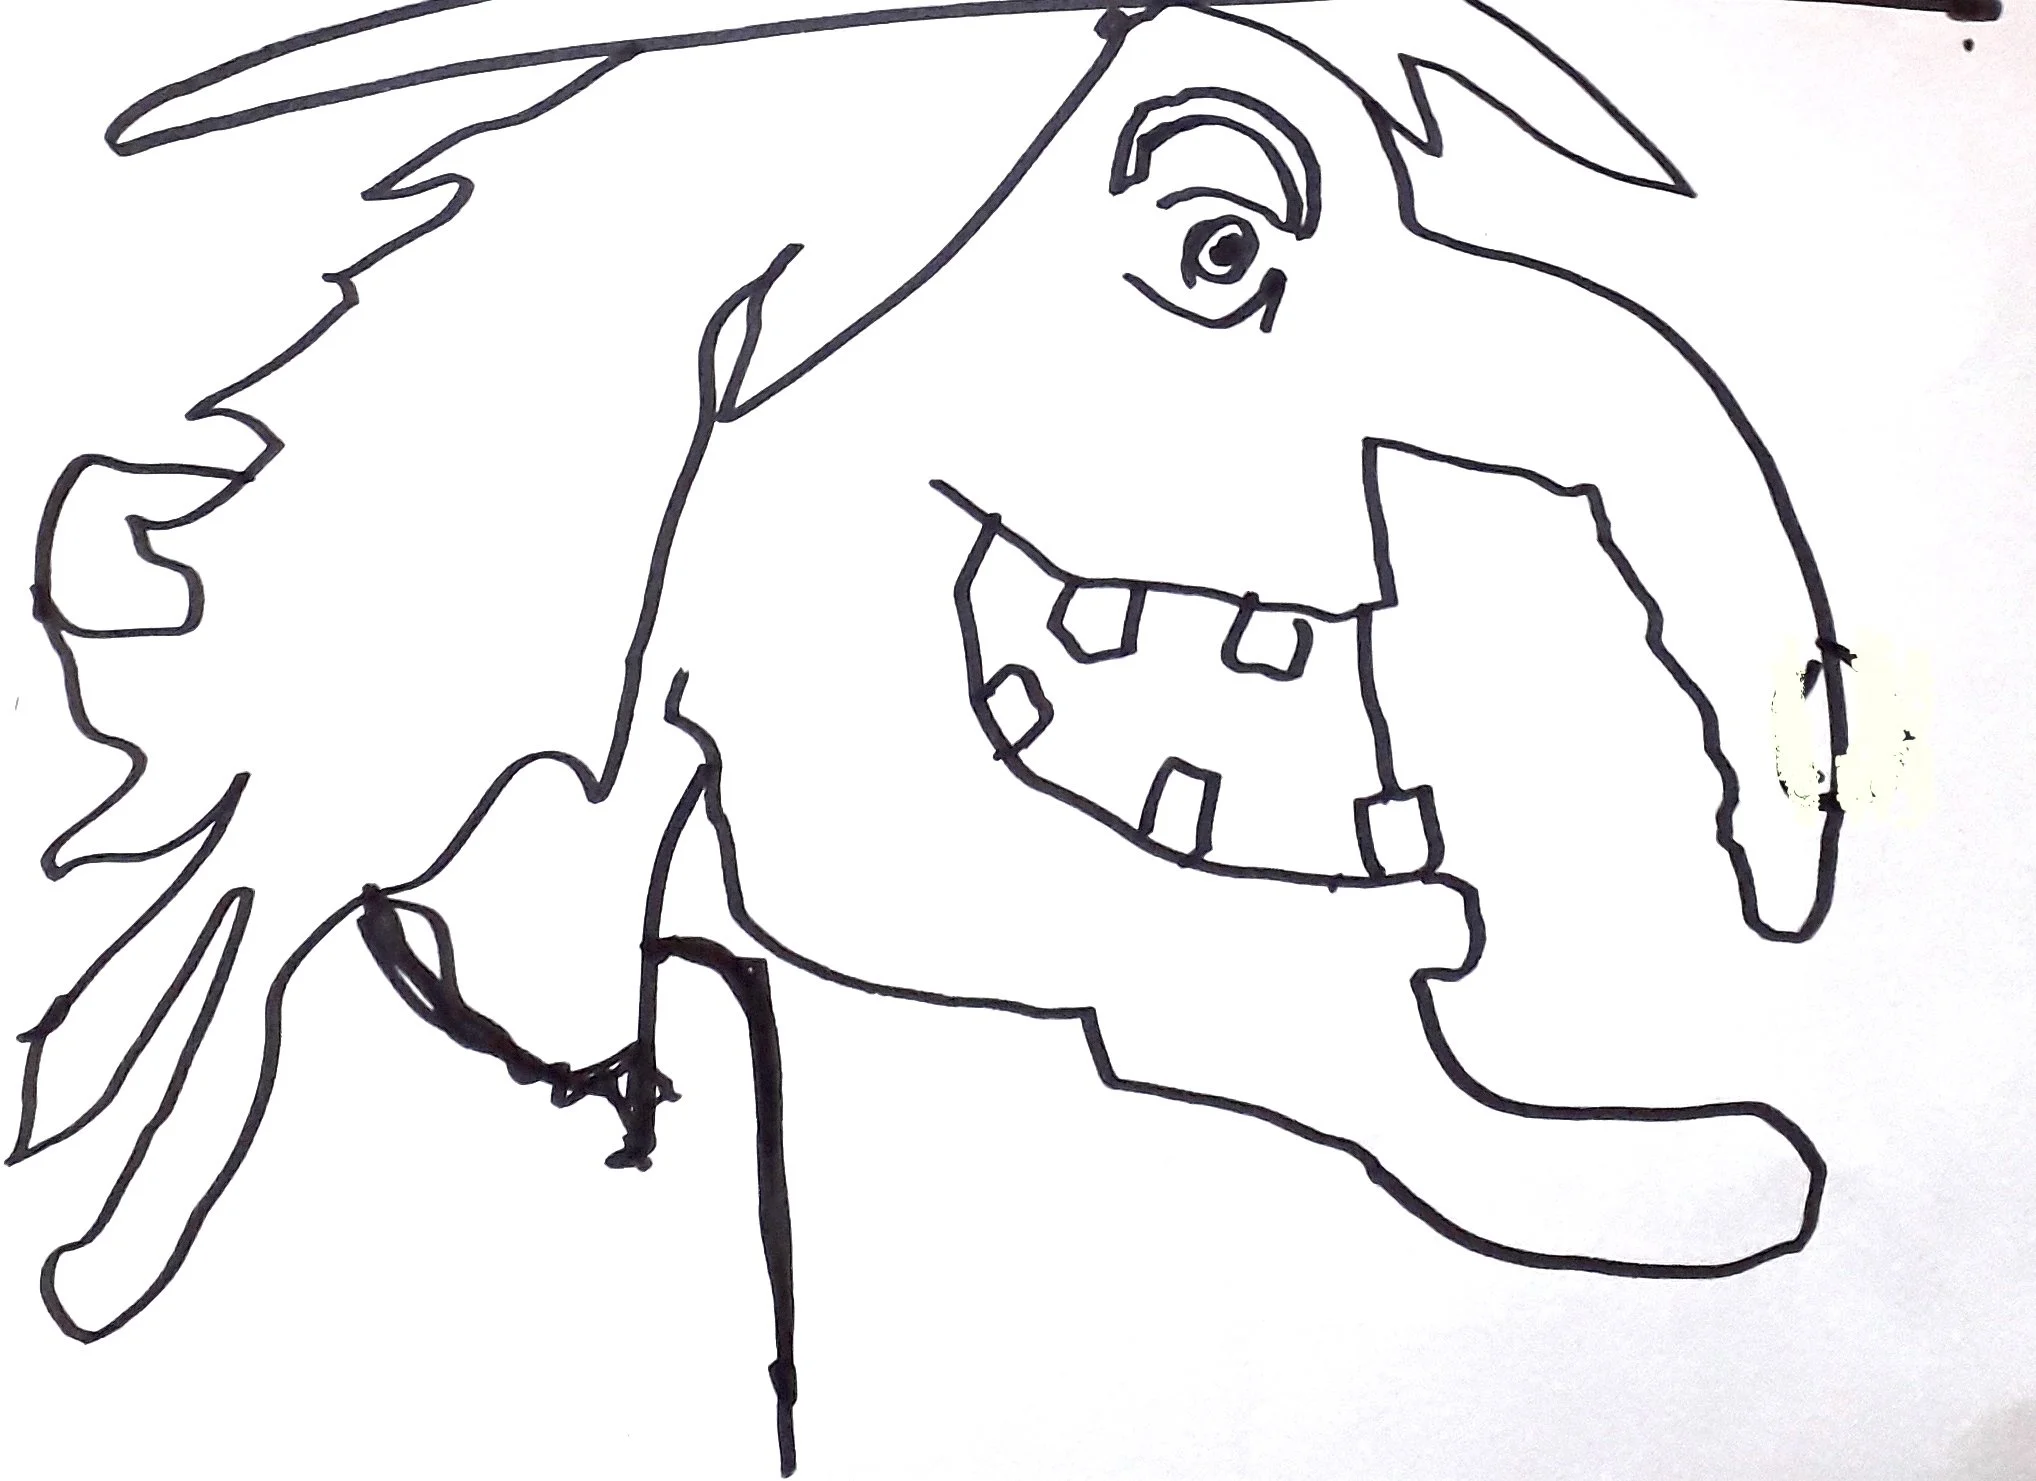
Draw the outline of a witch from the template here or print it out on white paper:
Now cut this out leaving a small space around the edge of the witch.
Step 3:
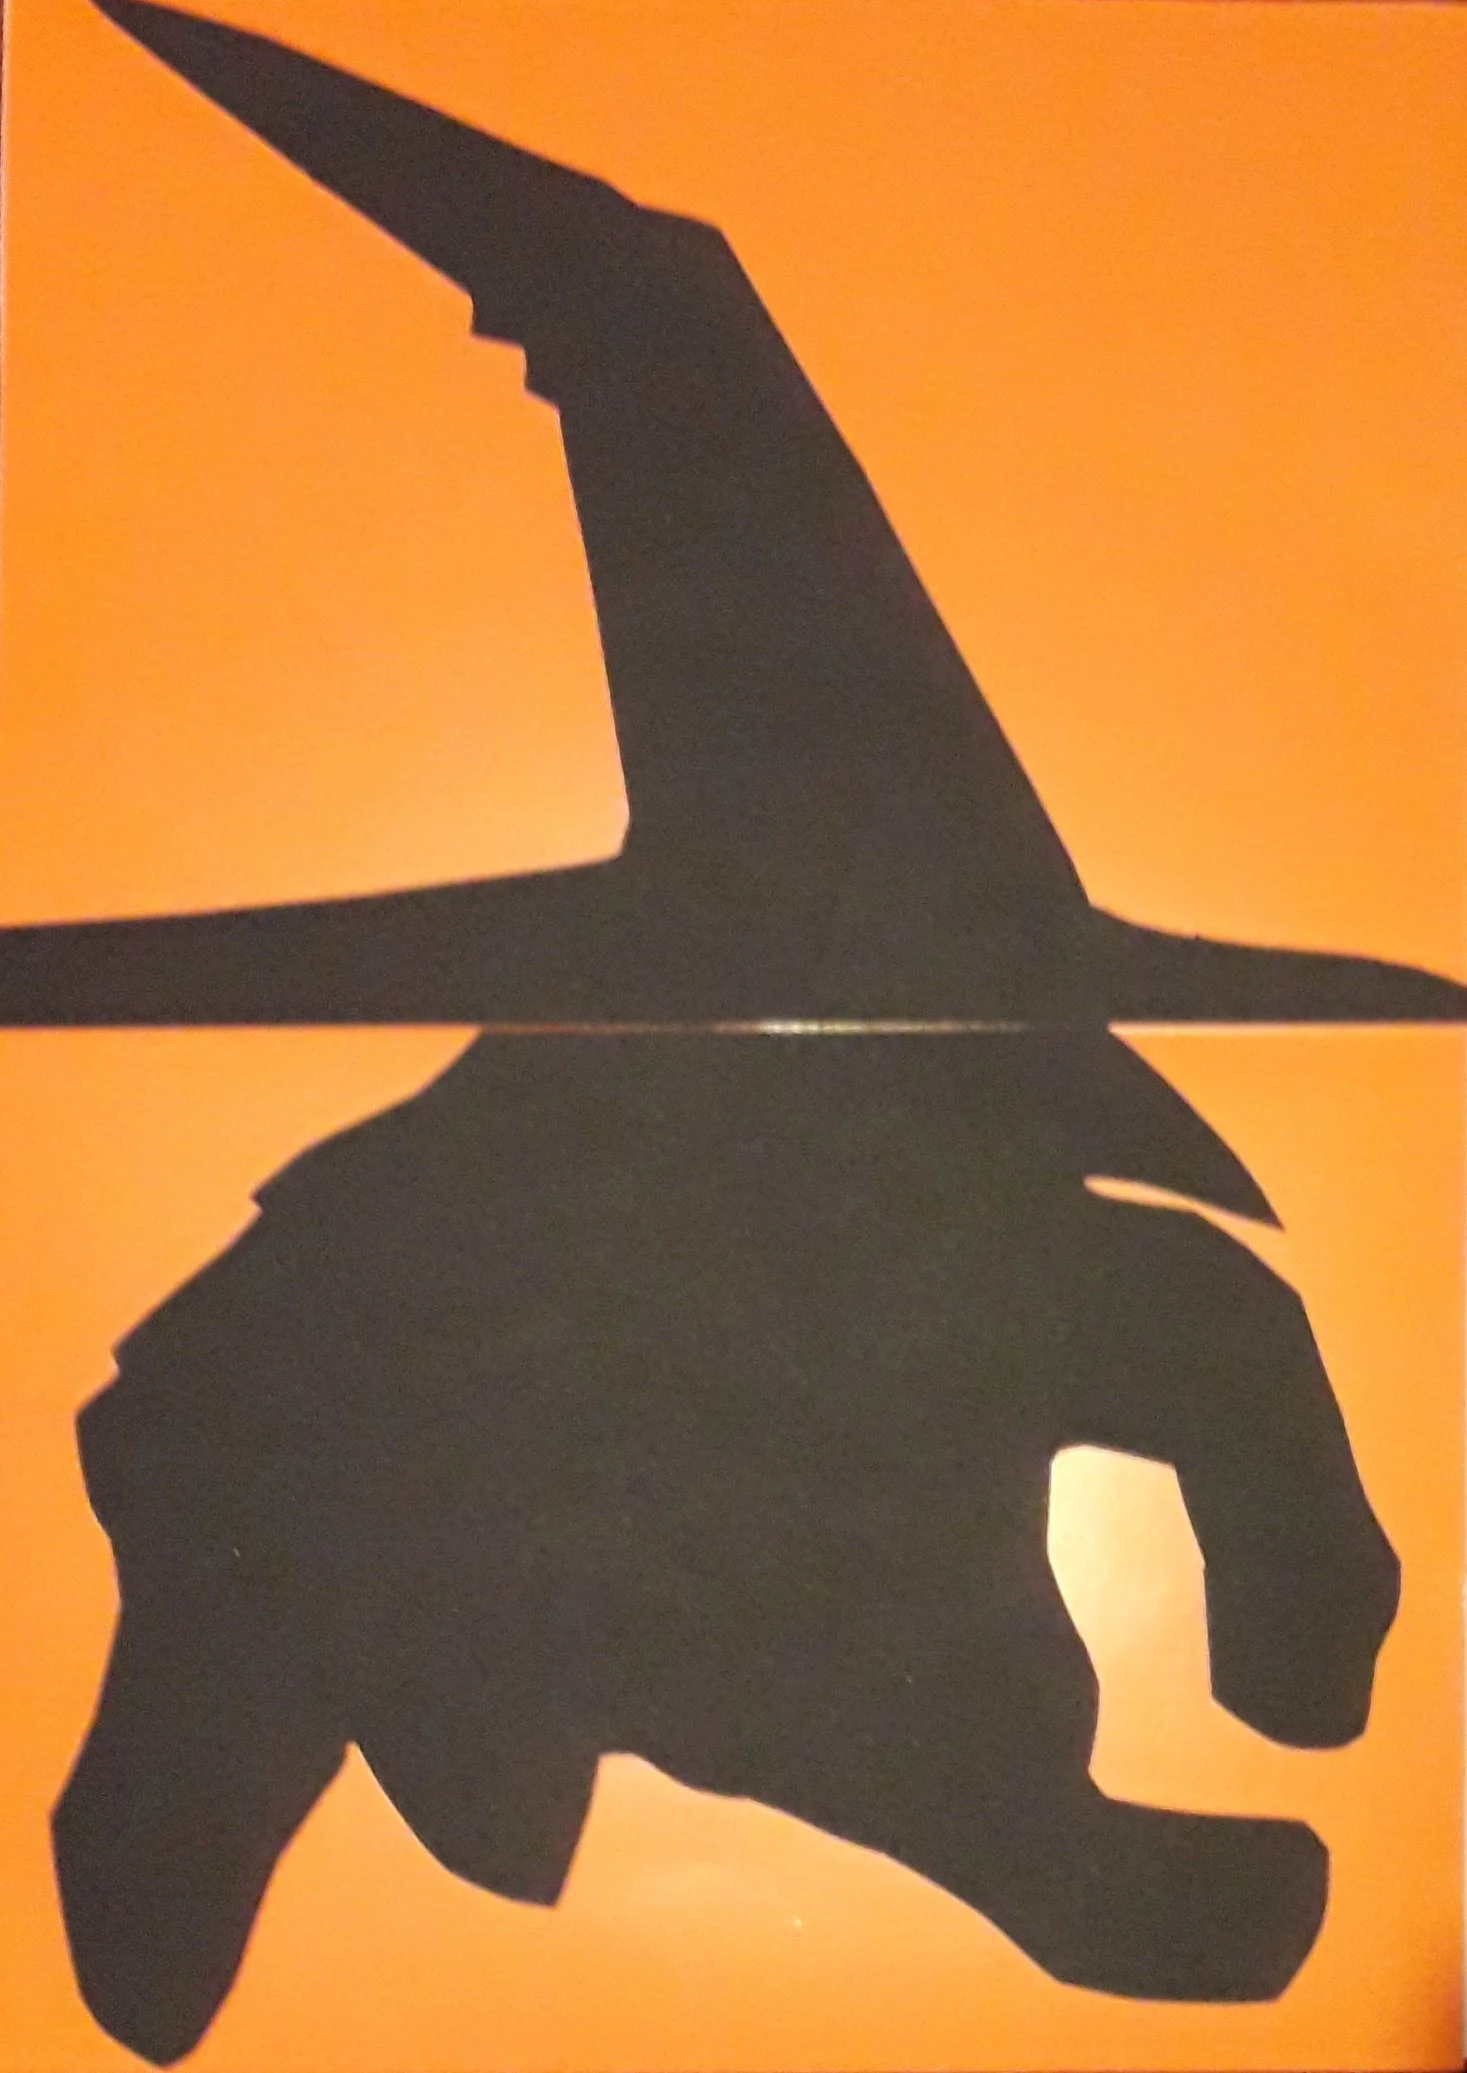
Take black paper or card and cut around the white template of the witch and hat that you printed out- paste onto background.
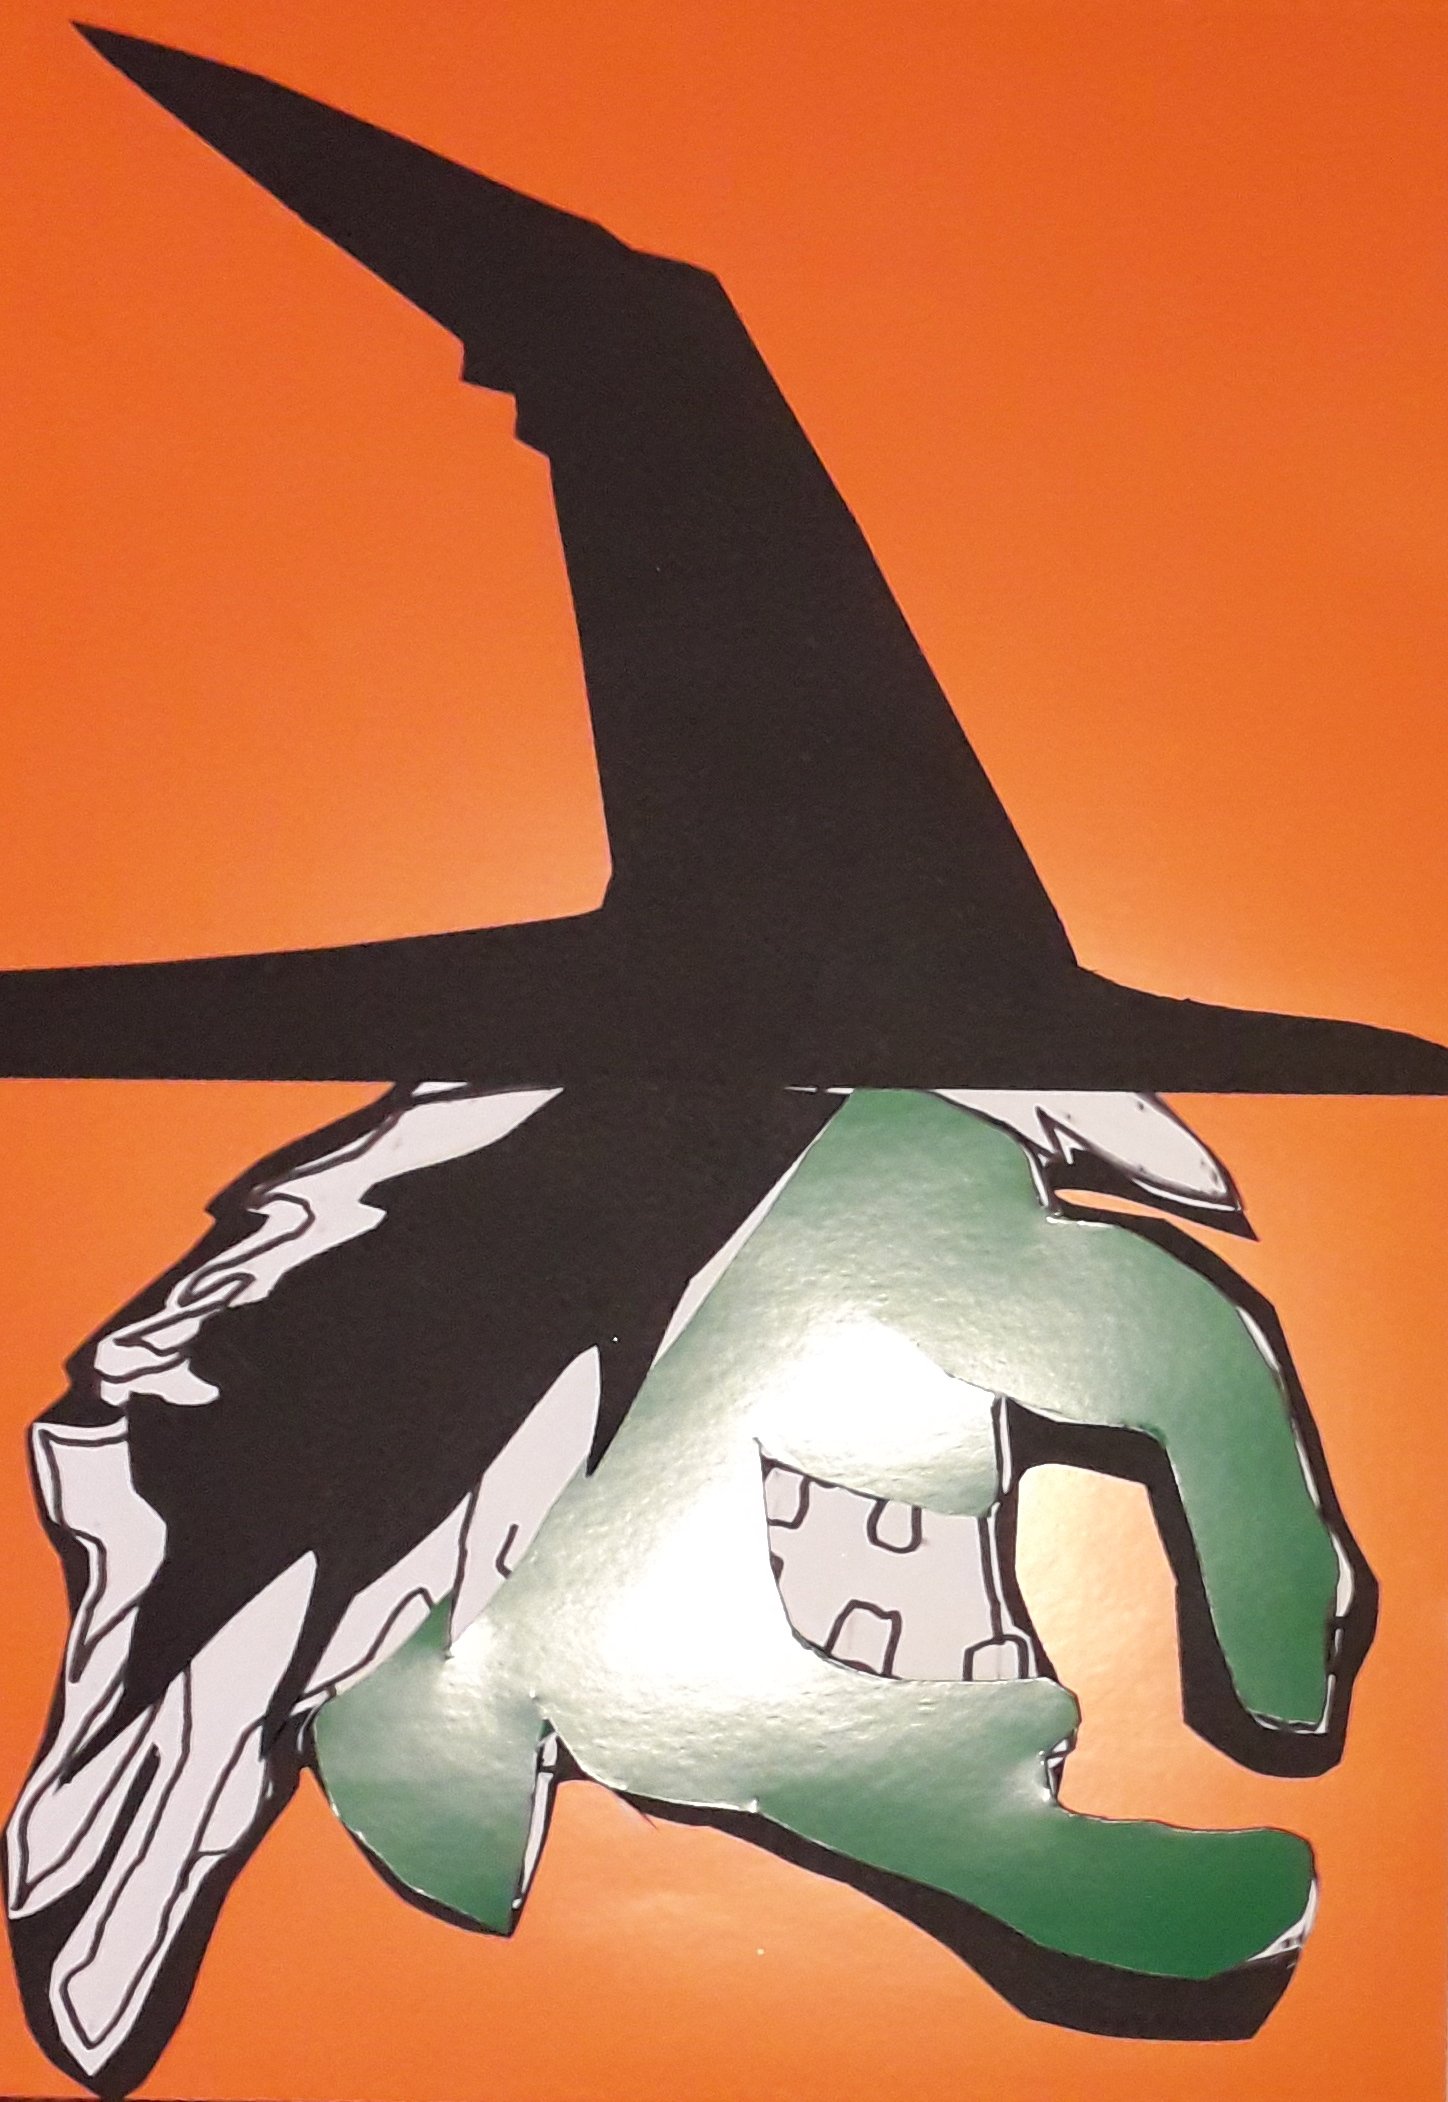
Also use green paper/card and only cut out the face.
Step 4:
Using PVA glue paste the black outline of witch and hat on first.
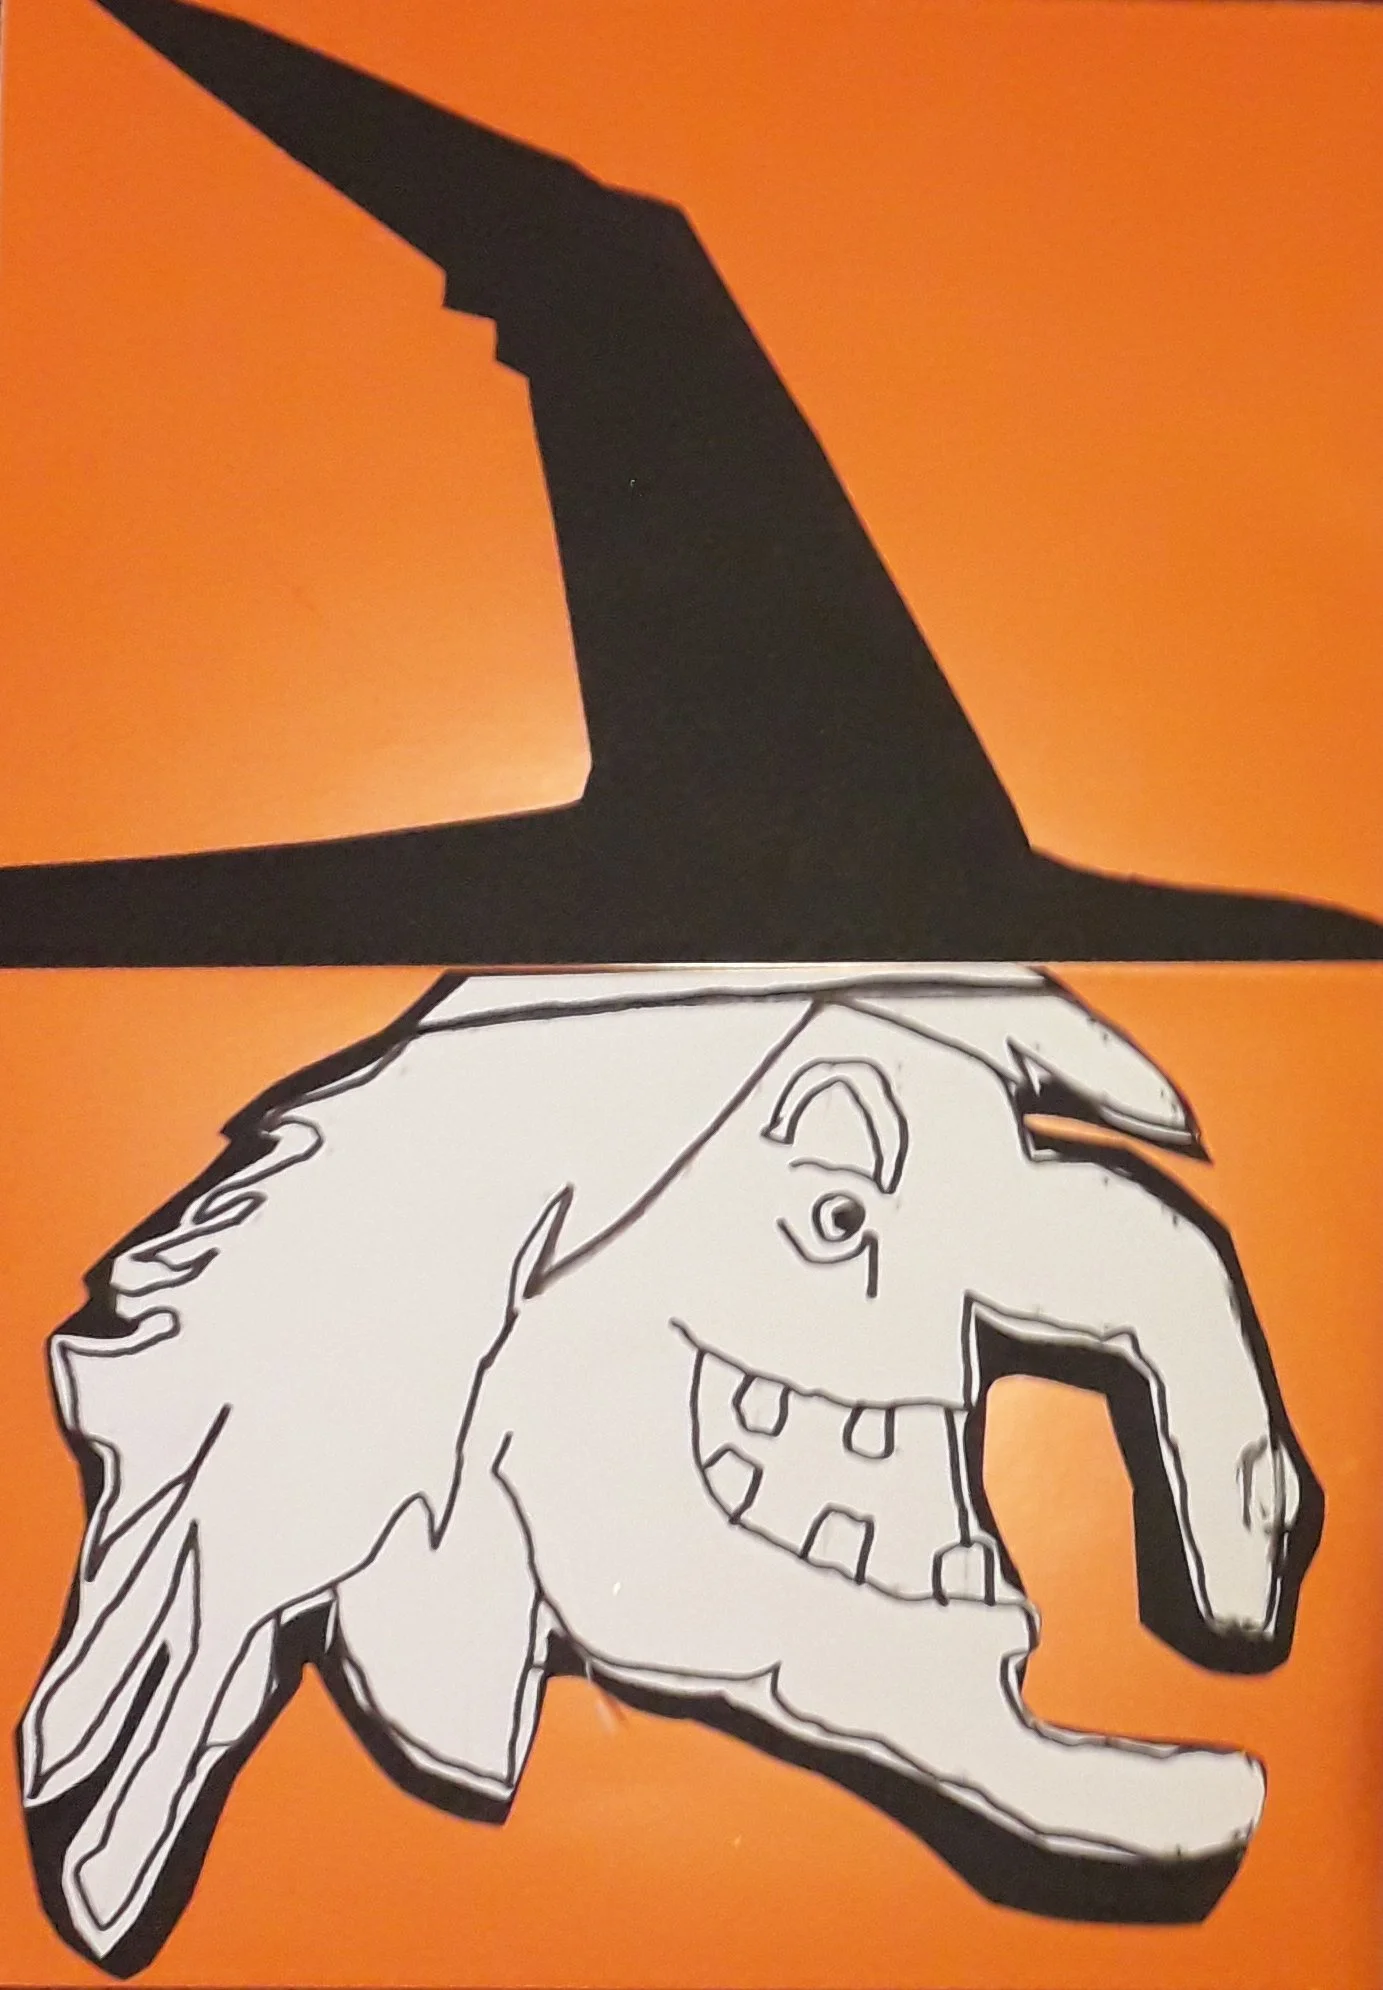
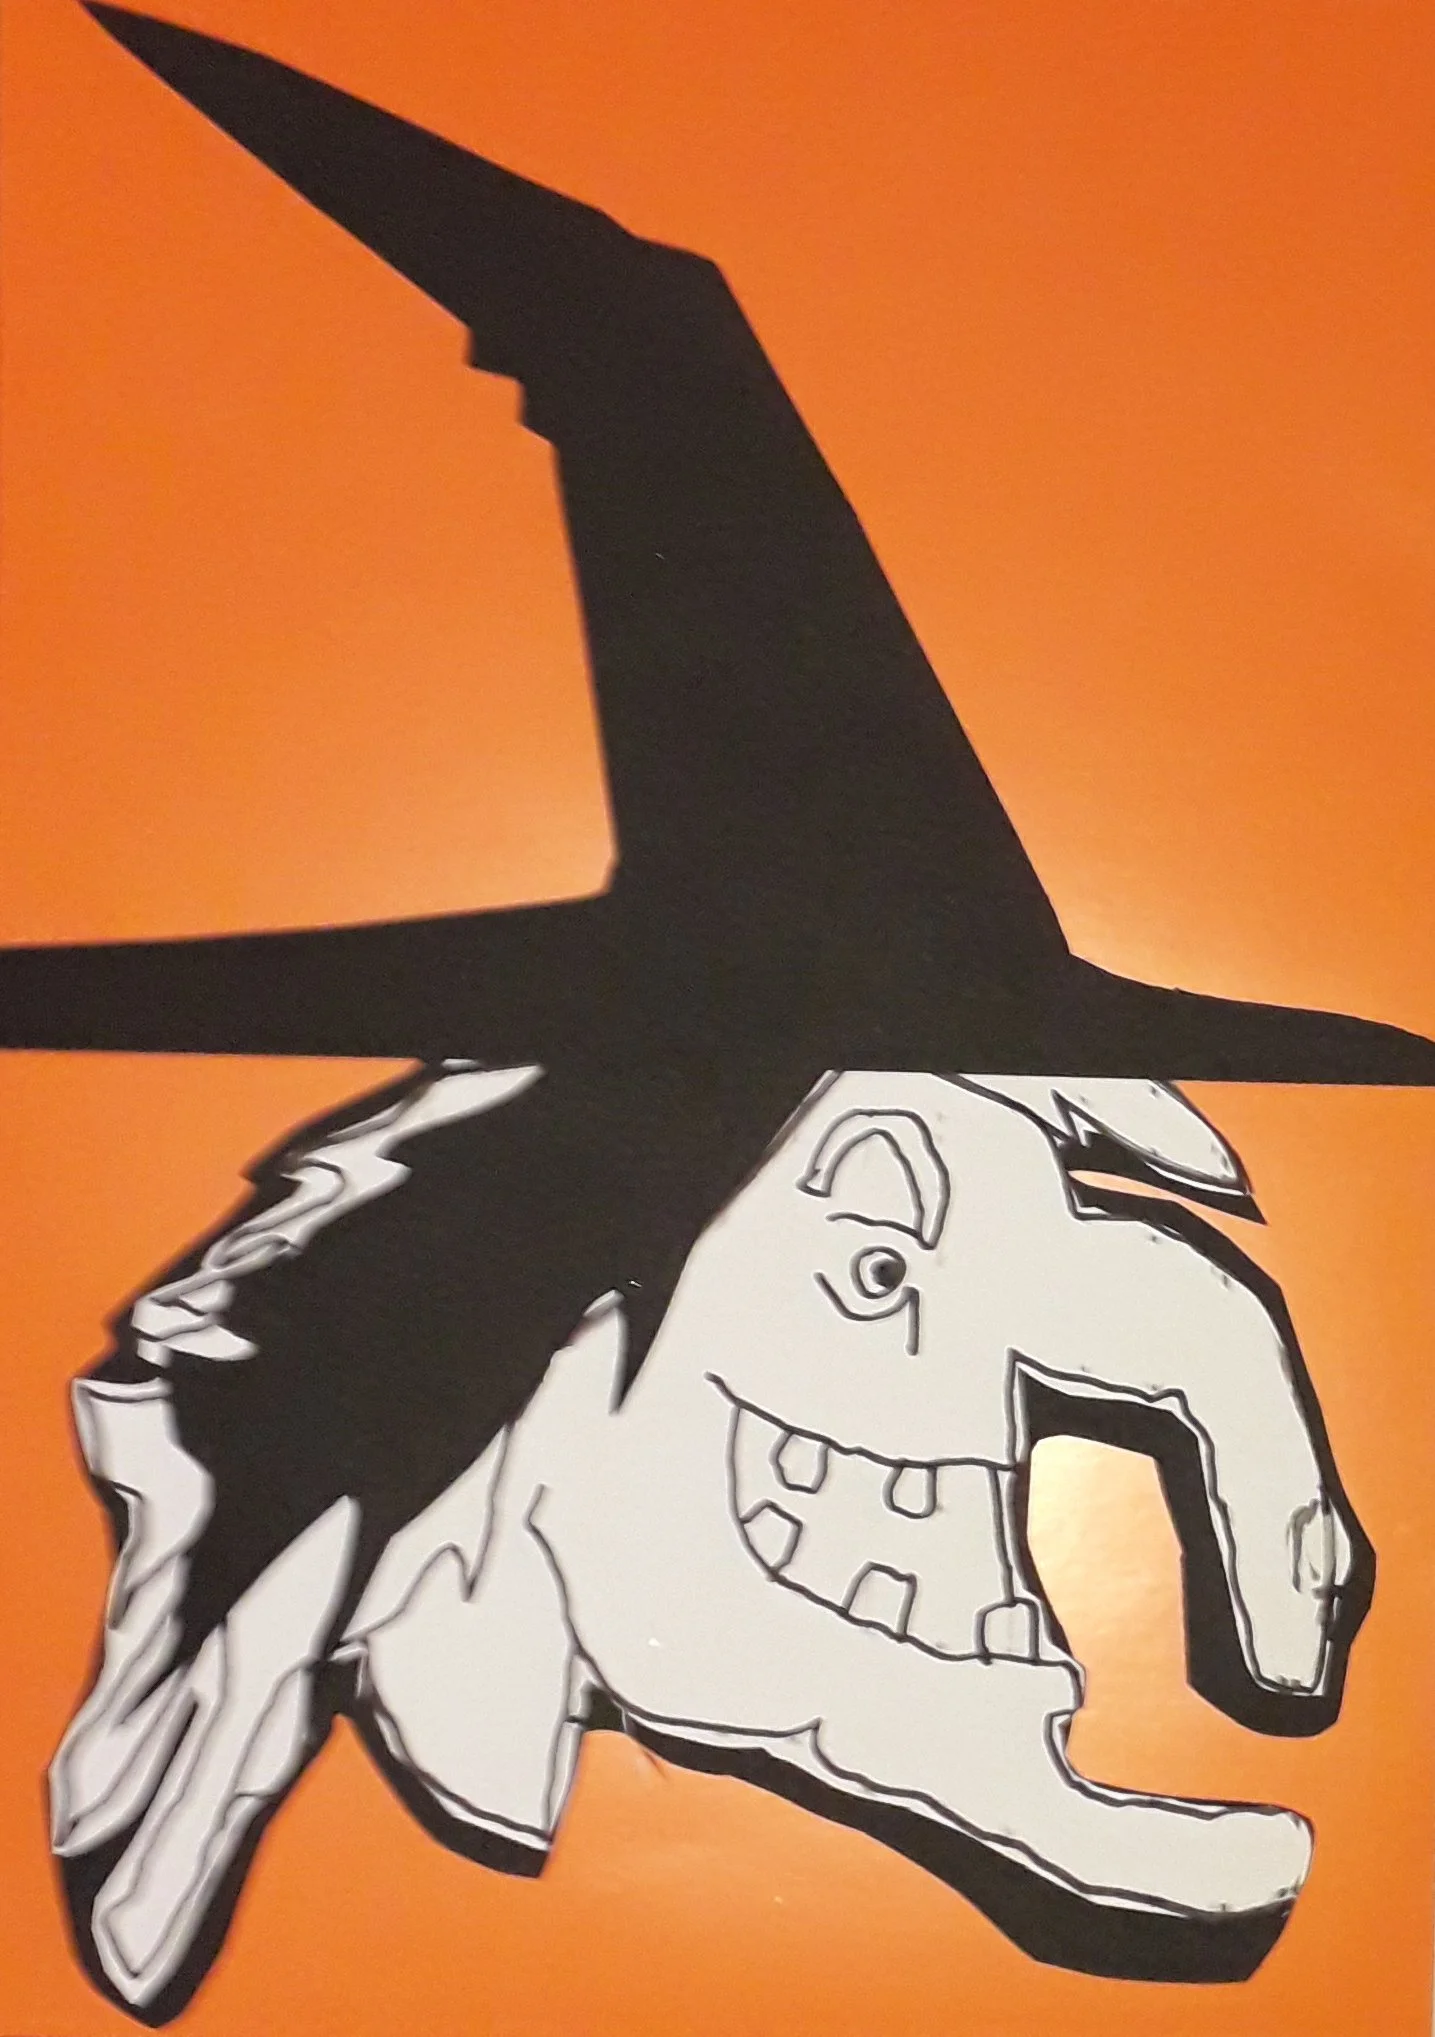
Then cut the white template with just the face and hair and paste over the black template. The black will show up behind the white outline.
Step 5:
Paste on the green paper/ card for the witches face.
Step 6:
Cut and paste on the eye and teeth with black paper.
Step 7:
Cut out a round shape for the moon and with paper for the flat cloud , then black paper for a flying witch in the background.
Step 8;
Complete the image with glitter using PVA glue.
To make the image stand up, use A4 card on the back and paste both ends and stand the image up.
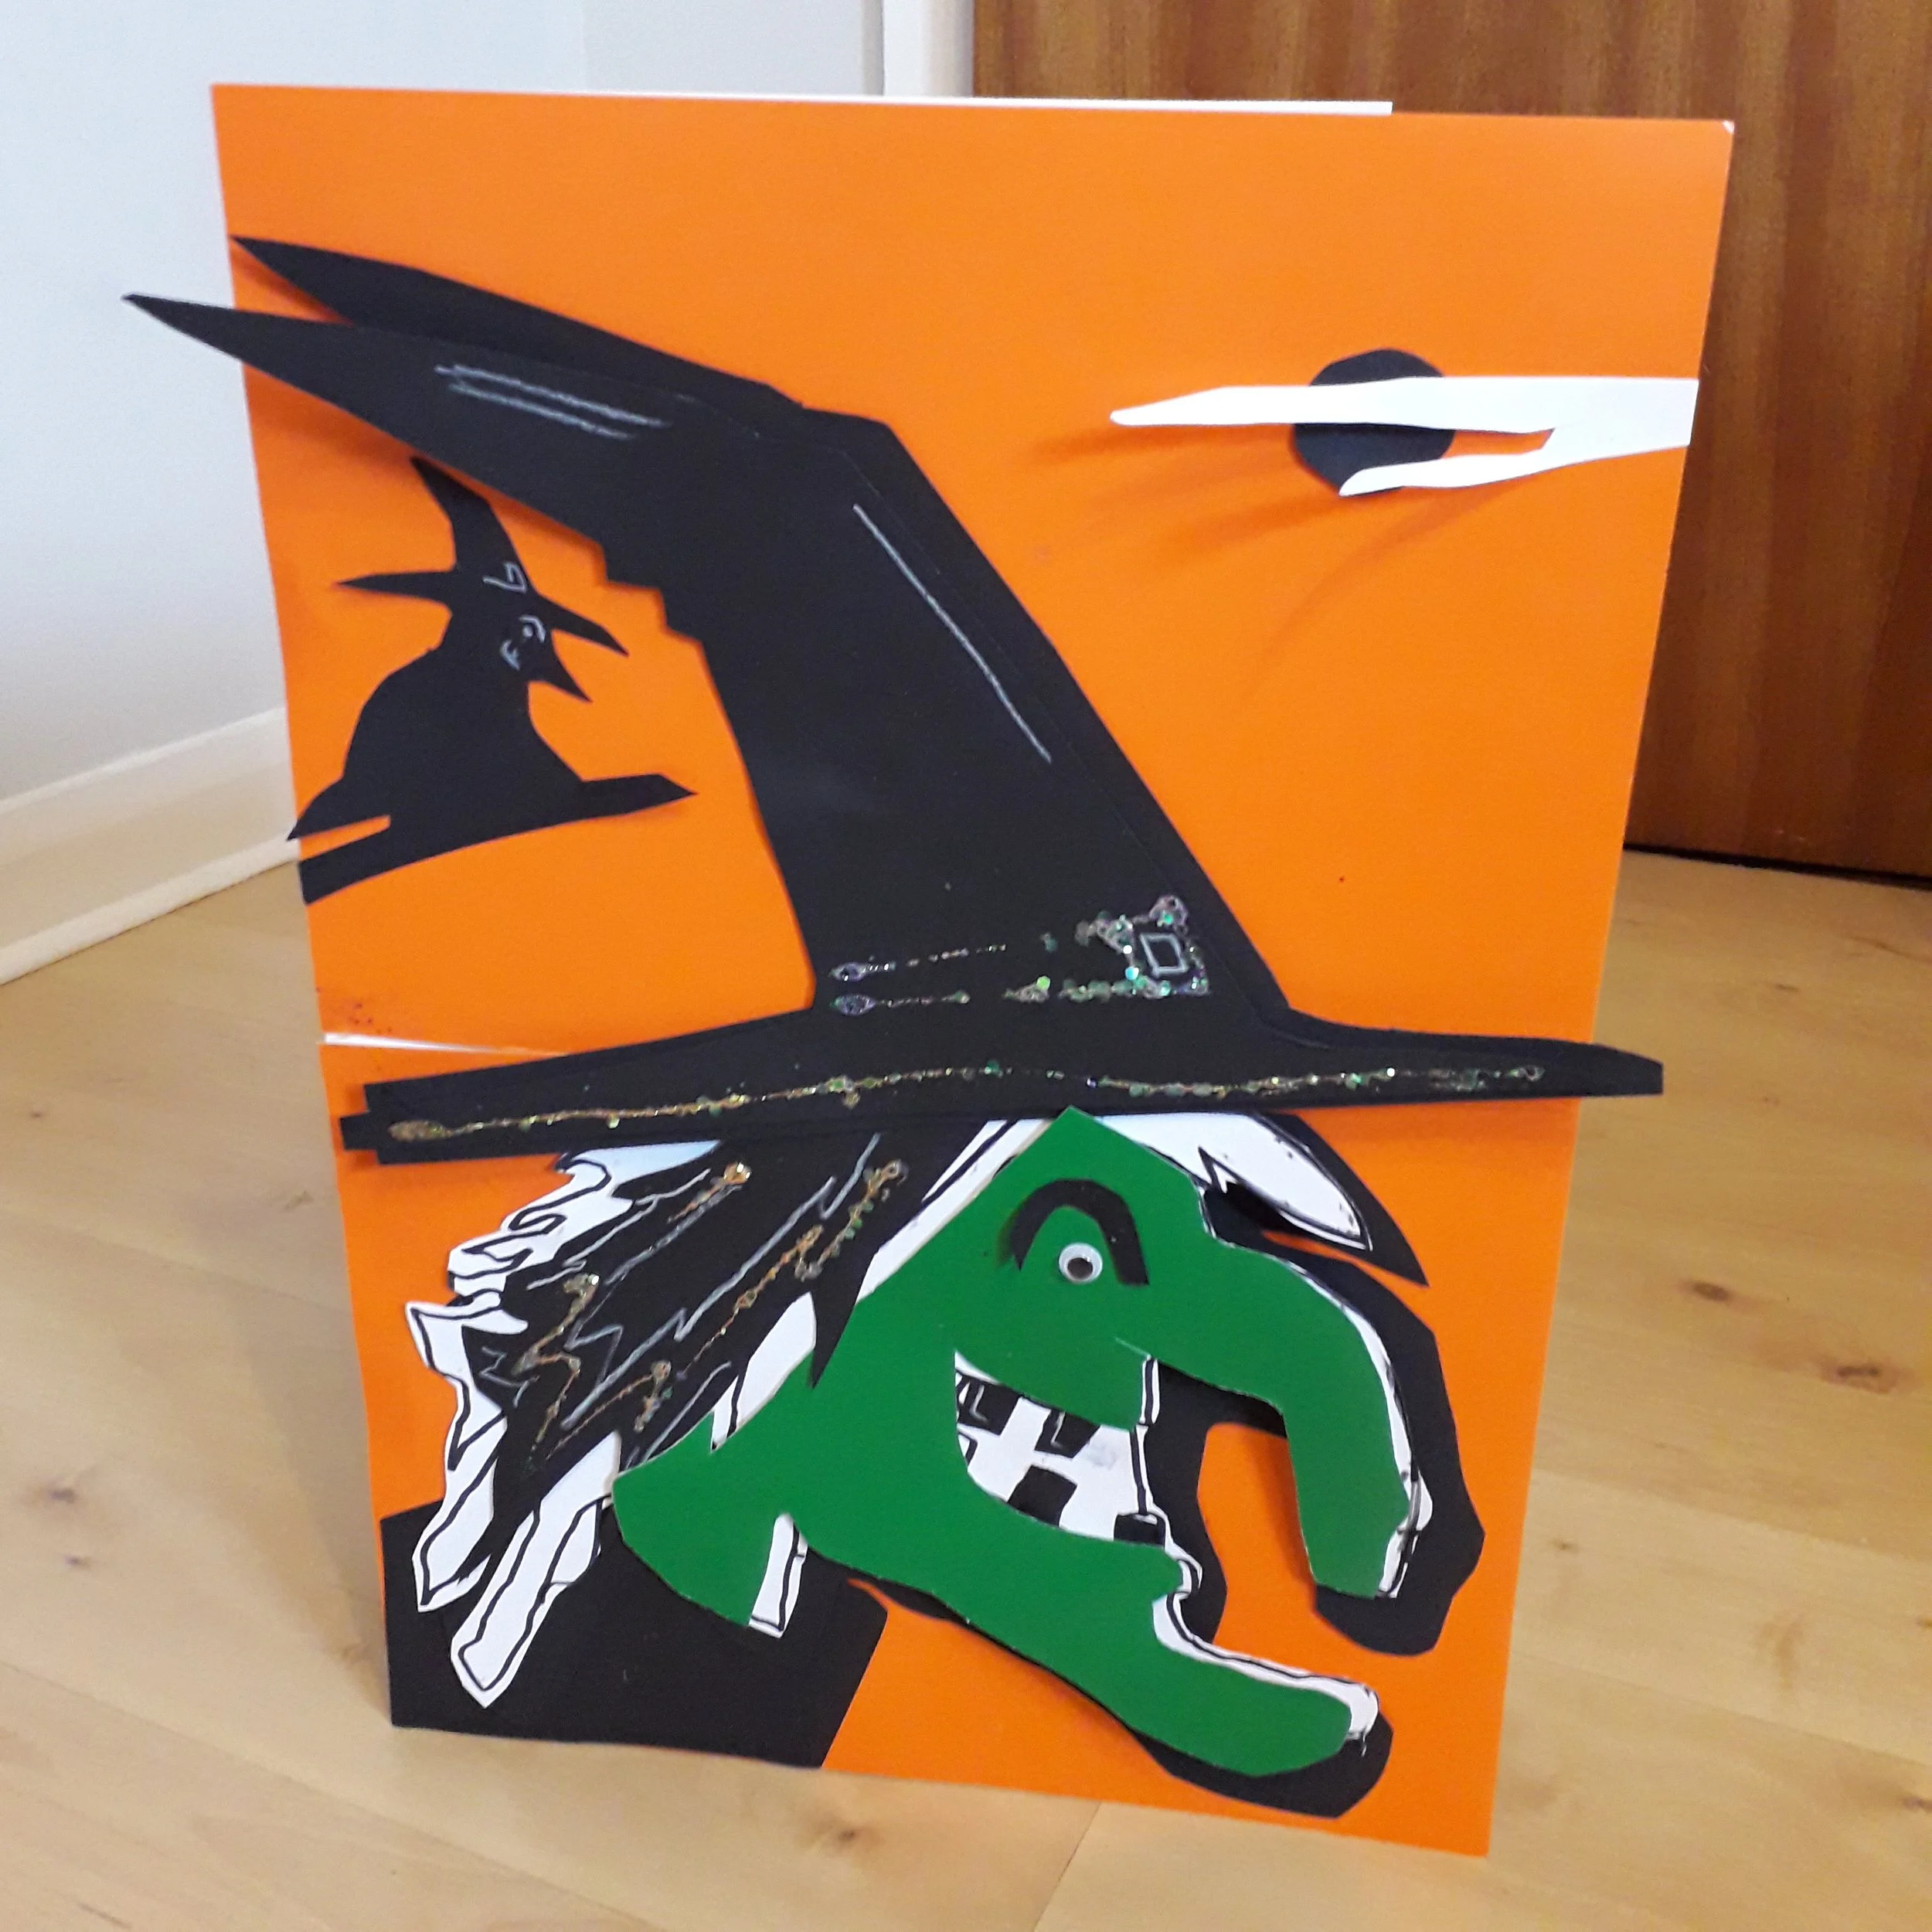
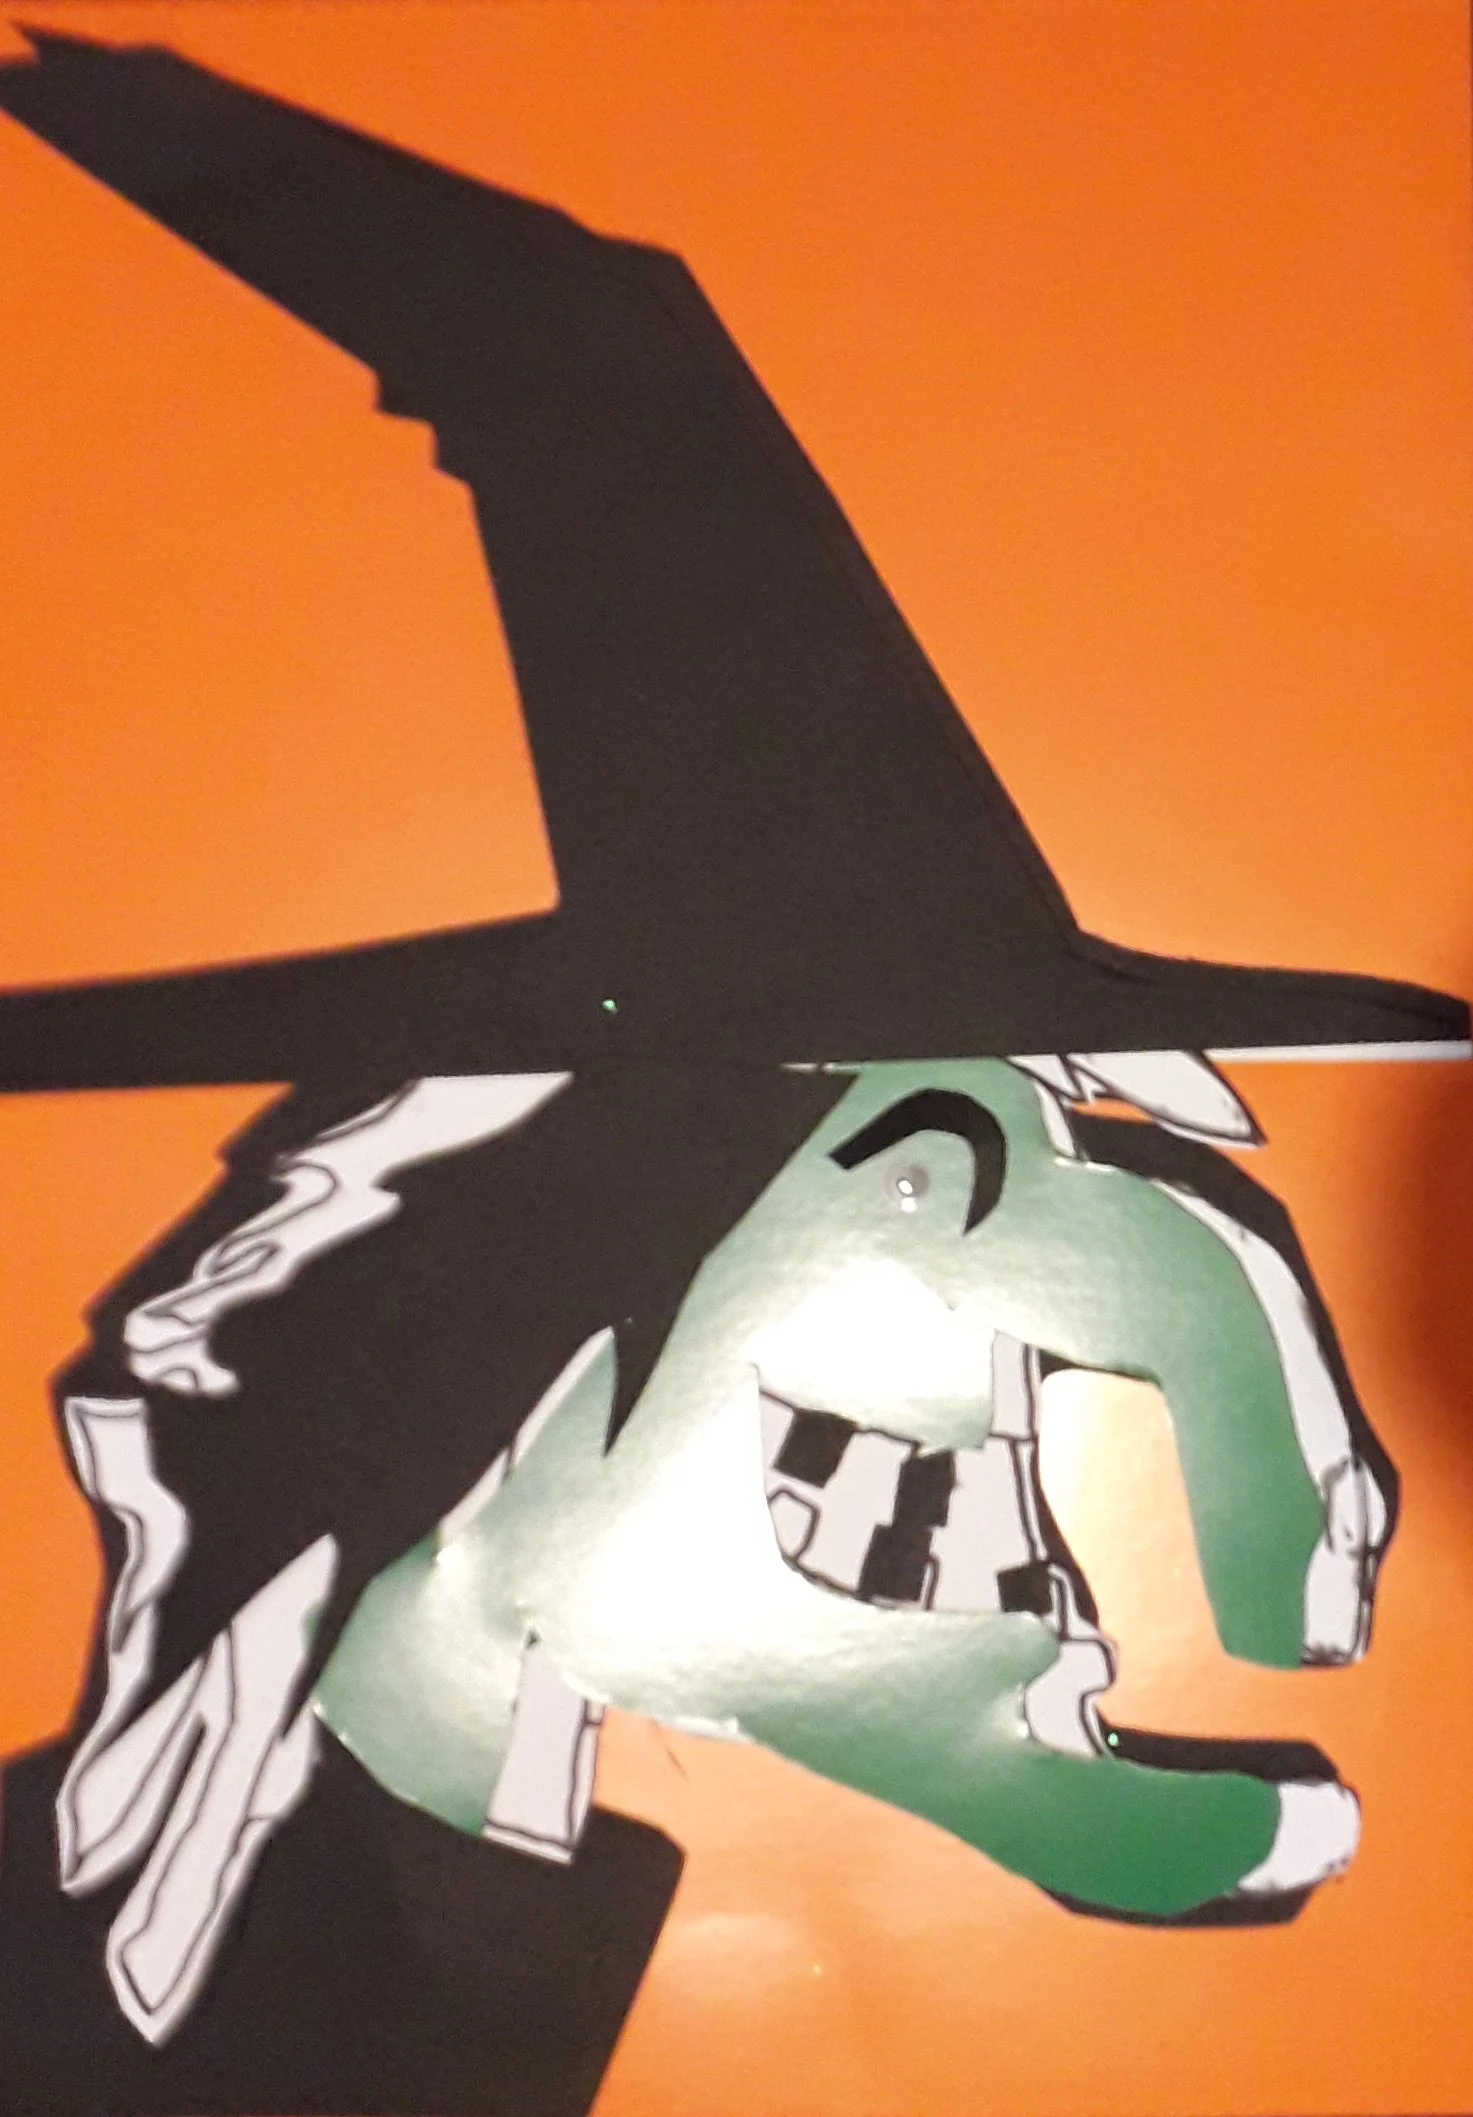


Artist - Helen Johnston.
Artist - Helen Johnston.
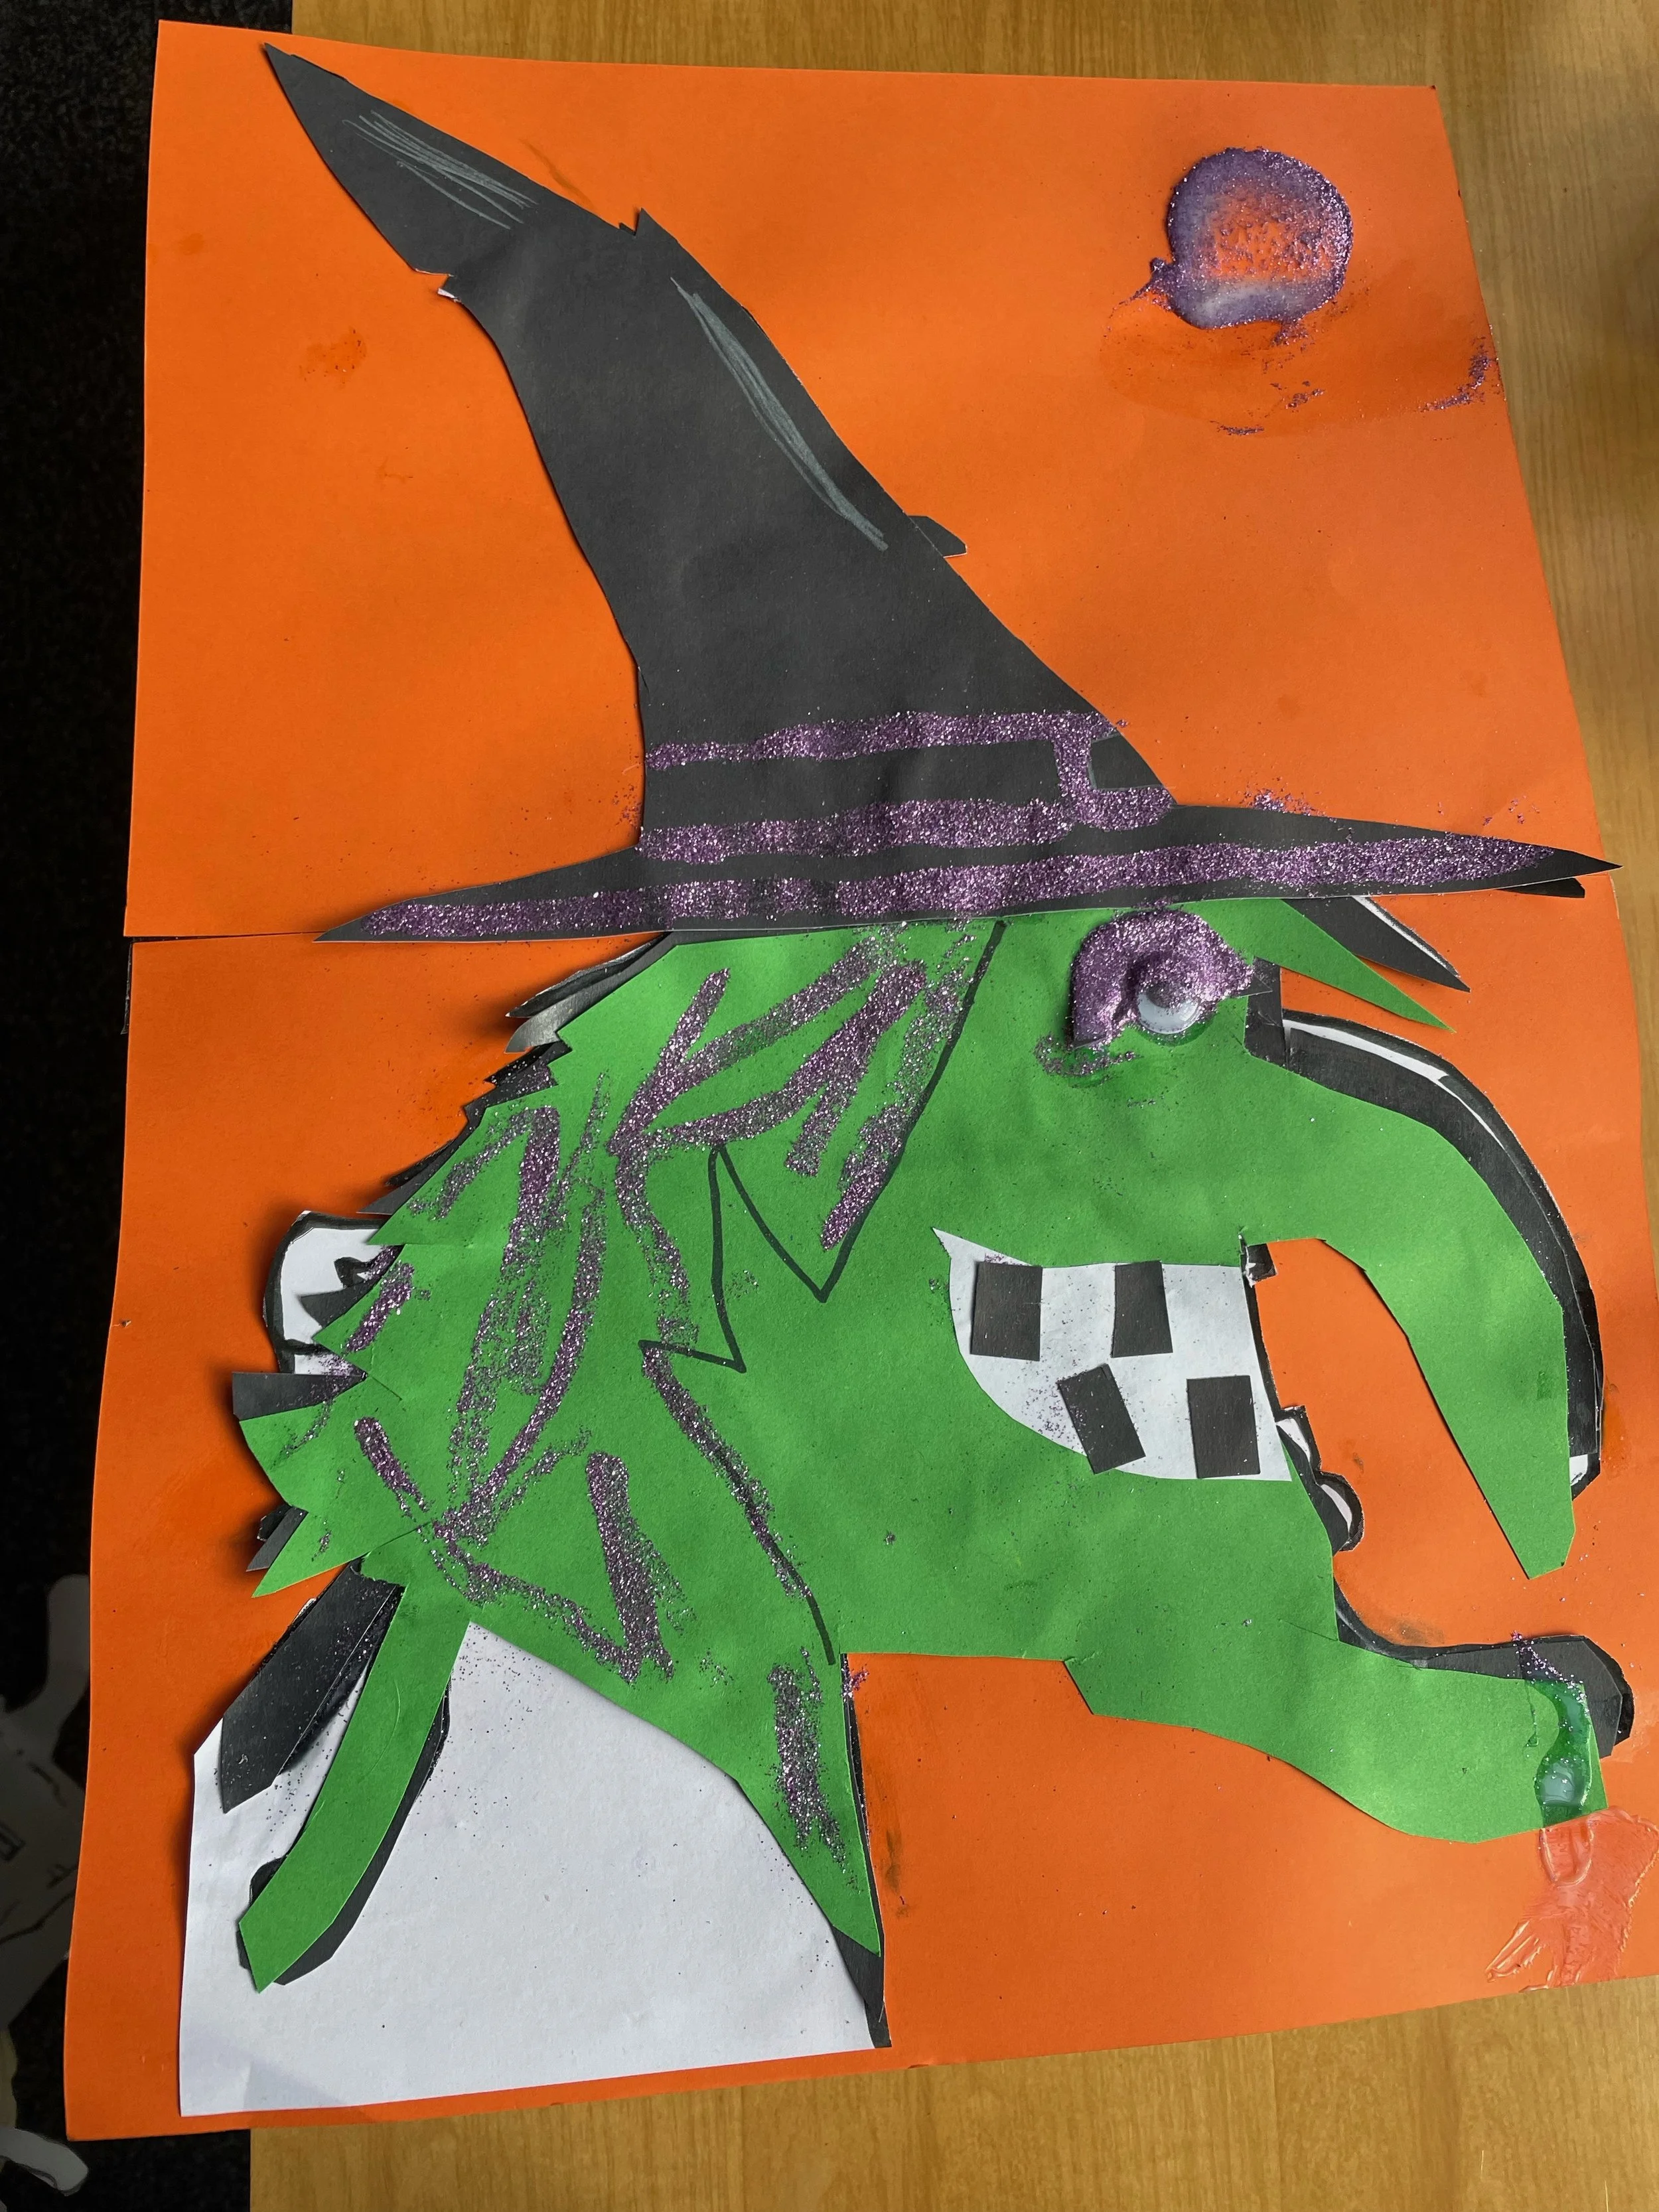
Witch and hat by Helen Johnston:
Helen made her witch with hat over 2 sessions here: